

 en
 English
 русский
 Español
 عربى
 ไทย
C-Shaped Steel Purlin vs Z-Shaped Purlin: Span, Lapping and Selection Guide
2026-09-21 - Last Updated: 2026-09-20
Content
- 1 C Purlin or Z Purlin: The Comparison in One Table
- 2 Why the Profile Shape Changes the Structural Behaviour
- 3 Span, Continuity and the Lapping Advantage
- 4 Sizes, Thickness and Tolerances Worth Writing into the Order
- 5 Installation Details That Decide Whether the Roof Performs
- 6 Where Each Section Fits in Real Buildings
- 7 Cost, Procurement and the Risks That Get Overlooked
- 8 FAQ
A 30-metre clear-span roof over an electronics assembly hall is on the pricing table, and the same question arrives from the project engineer: C-shaped steel purlin or Z-shaped purlin? For most long-span industrial roofs, the answer is the Z section, because the profile can be lapped over the rafter and then verified as a continuous beam. Reach for the C section when spans are short, the roof is simple, and a straight single-span channel satisfies the load case without extra detailing.
Both profiles are roll-formed from the same galvanised strip and are often quoted at a similar price per tonne. What separates them is geometry, and geometry decides how the purlin carries load, how it is fixed to the frame, and how much steel the roof actually needs.
C Purlin or Z Purlin: The Comparison in One Table
If you have two minutes, the table below carries most of the decision. The sections that follow explain the mechanics behind each row and the procurement details that are easy to miss at tender stage.
| Feature | C-shaped purlin | Z-shaped purlin |
|---|---|---|
| Cross-section | Channel with a single axis of symmetry | Point-symmetric section, rotated 180 degrees to nest with the next purlin |
| Jointing at the rafter | Butted end to end; a cleat or sleeve carries the shear | Lapped and bolted directly, so bending moment passes across the joint |
| Design assumption | Normally a simply supported single span | Normally a continuous beam over two or more spans |
| Practical span range | Short to medium | Medium to long |
| Typical roles | Small workshops, canopies, plant rooms, wall girts, mezzanine joists | Long-span roofs on factories, warehouses and wide modular buildings |
| Steel weight on long spans | Higher, because each span stands alone | Lower, because the lap shares the moment |
Two rules of thumb follow from that comparison. First, if the design still assumes a simple single span, the difference between C and Z is smaller than most people expect. Second, once lapping and continuity are allowed, the Z profile usually wins on tonnage for anything beyond roughly six metres of clear span.
- Short spans and simple roofs: C section, single span, cheapest to fabricate and install.
- Long spans and repeated bays: Z section, lapped into continuous runs, fewer tonnes for the same deflection limit.
- Wall girts and mezzanine joists: C section almost always, because straight channels bolt easily to columns.
- Mixed buildings: many projects use Z purlins on the roof and C girts on the walls.
Why the Profile Shape Changes the Structural Behaviour
C-shaped purlin: a plain, predictable channel
A C purlin is a channel: one web with two flanges pointing the same way. Roll-forming is straightforward, and so is the connection. The end of one purlin butts against the end of the next, and a cleat or sleeve transfers the shear across that joint. Designers usually treat the member as a simply supported single span, which is conservative but predictable.
The weakness is the open cross-section. The compression flange wants to buckle sideways, and the section twists unless the roof sheet is fixed to it and braces it. Purlin spacing, fixing pattern and the diaphragm action of the cladding therefore matter as much as steel thickness.
Z-shaped purlin: point symmetry built for lapping
A Z purlin is point-symmetric: turn one section 180 degrees about its web and it fits against the next like a zip. That single feature creates the commercial advantage. The purlins overlap at the rafter, and the bolt group at the lap transfers bending moment rather than shear alone. The run behaves as a continuous beam, mid-span moment falls, and the deflection limit becomes far easier to satisfy.
Because the flanges point in opposite directions, both the upstand and downstand flange can be fixed to the cladding without extra cleats, and the profile resists twist more effectively than a channel of the same weight.
 C-shaped steel purlinsC-shaped steel purlins are thin-walled steel structural components with C-shaped cross-sections formed by cold bending. They are mainly used for load support and force...View Product →
Span, Continuity and the Lapping Advantage
Roof purlins are usually governed by deflection rather than by stress. Many industrial specifications set the limit between span/180 and span/240, depending on the cladding, suspended services and whether brittle finishes hang below. A continuous run reaches that limit with a lighter section than a series of single spans, which is the entire commercial case for the Z profile.
Lap length is the detail that decides whether the theory holds on site. A common specification is a lap of roughly 1.5 times the purlin depth, bolted through both flanges with two bolts per flange at each end of the lap. Shortening the lap to save a few bolts is one of the quietest ways a well-designed roof loses its continuity.
Indicative clear-span capability: C200 vs Z200, 2.0 mm steel
Treat the chart as a shape comparison, not a design. Real numbers depend on the actual span, purlin spacing, roof dead load, wind uplift, snow, and any services suspended from the secondary framing.
Sizes, Thickness and Tolerances Worth Writing into the Order
Purlin selection is not only about C or Z. The same profile behaves very differently at 1.5 mm and at 3.0 mm, and a change of steel grade can move the permissible span by a metre or more. The table lists the parameters that should be fixed before the order is released.
| Parameter | Common practice | Why it matters |
|---|---|---|
| Section depth | C100 to C300, Z100 to Z300 | Depth drives bending capacity and the lap length you need |
| Steel thickness | 1.5 mm to 3.0 mm | Thin sections need closer spacing or shorter spans |
| Base steel grade | S250 to S350 | Yield strength changes the moment capacity in the load table |
| Coating | Z275 or AZ150 for exposed roofs | Coating mass is the main driver of corrosion life |
| Holes | Pre-punched slots in the web, round holes in the flange | Pitch must match the roof sheet ribs and the rafter brackets |
| Length | Cut to the rafter grid, around plus or minus 5 mm | Laps and bolted splices need consistent lengths |
Two checks catch most sizing errors: hole pitch against the roof sheet and bracket layout, and the effective section properties in the supplier's load table, which change with grade, thickness and the lap length actually used on site.
Installation Details That Decide Whether the Roof Performs
Most purlin problems are installation problems. Geometry gives the Z profile its advantage, but only if the lap is assembled correctly and the run is kept straight.
- Set out purlin lines from the rafter grid and check the diagonal before fixing anything permanently.
- Fix the first purlin square and level, then use it as the reference for the rest of the bay.
- Lap and bolt as specified, filling every hole in the lap group rather than the convenient ones.
- Install sag rods or bridging where the design calls for them, and tension them evenly.
- Only after the framing is straight and fully bolted, start laying the roof sheets.
Watch for these recurring mistakes:
- Laps shortened on site so the sheets can be closed before rain.
- Bolts left finger-tight, so the continuous beam behaves like a chain of hinges.
- Sections mixed from different batches, giving visible camber differences along one roof line.
- Cut ends left untreated in exposed or humid locations.
- Uplift and suction ignored because the building is inland and the roof "never moves".
Where Each Section Fits in Real Buildings
Long-span distribution centres, factory roofs and wide modular buildings are Z country, because the rafter spacing is large and continuity pays. Light canopies, small workshops, plant rooms and wall girt lines are C country, because the spans are short and a straight channel is quicker to handle and bolt.
 YX 35-125-750 High-Strength Factory Roof Colored Steel Profiled SheetYX 35-125-750 High-Strength Factory Roof Colored Steel Profiled Sheet is a profiled sheet specifically designed for industrial plants and large-span roofs, featuring s...View Product →
Purlin spacing is never an isolated decision either. It has to match the spanning ability of the roofing profile between purlins and the fixing pattern the sheet supplier requires, which is why purlins and cladding are best specified together rather than bought separately.
Controlled-environment factories follow the same logic, because the steel frame above a cleanroom ceiling still has to carry ductwork, filters and service loads. If you want the wider picture of how purlins sit inside a complete frame, our overview of how a steel structure framework is put together explains the primary and secondary members as one system.
Cost, Procurement and the Risks That Get Overlooked
Purlins are quoted per tonne but bought per metre, and the two numbers can diverge quickly when coating, punching and transport are added. Understanding what drives the per-tonne price makes tender comparisons far more honest.
Indicative cost drivers for galvanised purlins, per tonne
Steel strip 62%
Galvanising 14%
Forming and punching 14%
Transport and handling 10%
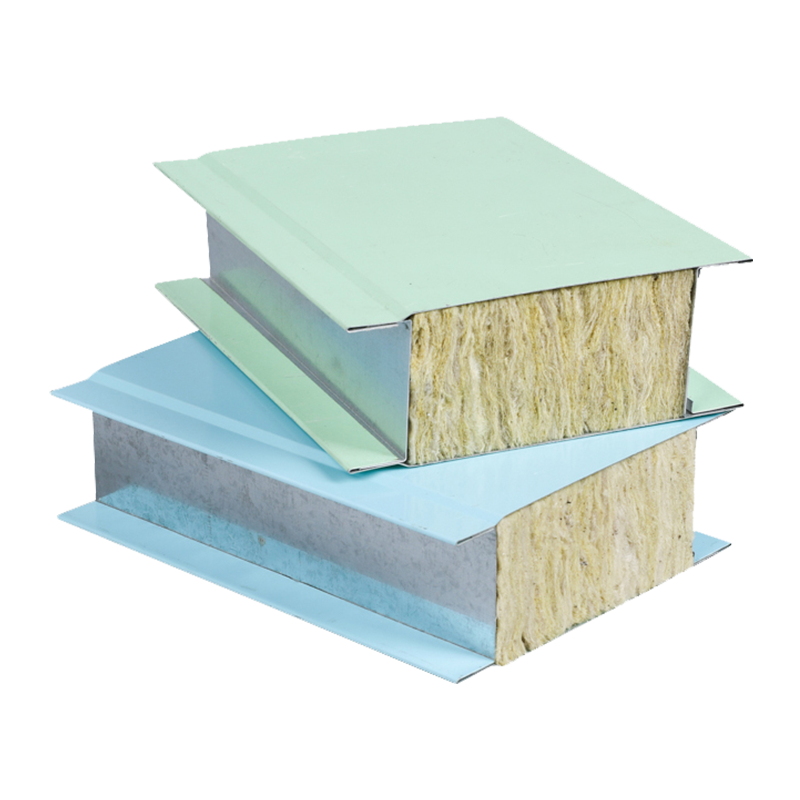 Steel Structure Framework SupplierCleanroom systems Clean room panelsView Product →
- Confirm coating mass, not just the word "galvanised", especially for humid or coastal sites.
- Confirm steel grade and thickness tolerance, because the load table is written around them.
- Ask for load tables using the lap length your installer will actually build.
- Check that lap bolts, cleats, sag rods and flashings are included in the quotation.
- Treat a late substitution of C for Z as a design change, not a supply detail.
Buying purlins, profiled sheets, sandwich panels and floor decking from one supply chain removes the arguments that appear when a roof leaks, a hole does not line up, or a lap will not close. Our steel structure system range is built around that single-source approach for industrial and controlled-environment buildings.
FAQ
Is a Z purlin always stronger than a C purlin?
Not in itself. A single-span Z section is only marginally better than a comparable C section. The advantage appears when the Z purlins are lapped and analysed as a continuous beam, which is how they are normally used.
Can C purlins be lapped?
They can be butted with a sleeve or cleat, but the flanges cannot nest the way a point-symmetric Z does. That makes a true moment-carrying lap difficult, so C sections are usually designed as single spans.
What lap length should I specify for Z purlins?
A common starting point is 1.5 times the purlin depth, confirmed by the manufacturer's load table for your span and spacing. Increasing the lap beyond the table value adds cost without adding capacity.
Which purlin is cheaper?
Per tonne, they are usually close. Per square metre of roof, Z purlins often win on long spans because less steel is needed, while C purlins win on short spans where the lap detail adds cost without benefit.
How far apart should purlins be spaced?
Spacing is set by the roof sheet's spanning capacity and the purlin's own load table. Typical industrial spacing falls between 1.2 m and 1.8 m, but the governing number comes from the calculation, not from habit.
Choose the profile that matches the span and the jointing method, then confirm the size, thickness, coating and lap length in writing. On short, simple roofs the C section is the economical answer; on long bays where deflection governs, the lapped Z section usually delivers the lighter roof.
If you are weighing both options for an upcoming project, send us your drawings and load requirements and we will come back with a section schedule, lap detail and quantity take-off.
Message Feedback
Product Categories
Easily navigate and discover our complete range of solutions through our logically structured product
categories.



- E-Mail: [email protected]
- Tel: +86 18968239620
- Address: Room No.905, He Yuan Mansion, No. 382, Tianda Lane, Ningbo Southern Business District, Yinzhou Ningbo China
Quick Links
Contact Us
© Copyright Zhejiang Kaisier Clean Technology Co.,Ltd.
All Rights Reserved.
 Cleanroom Systems Manufacturer
Modular Cleanroom Solutions Factory
-
+86 18968239620
-
-
